

Deploy application in GCP using Kubernetes
Understand the deployment on GCP
Problem Statement:
Usually while working into some projects we get stuck once in while in situation where a particular usecase is executing well in our local machine but when we try to share the same app to anyone else to check it fails there. There is nothing wrong in the app code or the usecase but the main issue is with the Environment where the app is being executed. There might not be any uniformity between the version used to develop the app and the version where it is being independently executed. How we can over come this situation.
Container: [Docker]
A container is a type of software that packages and bundles up an application and all its dependencies so the application runs reliably from one computing environment to another. Docker is a type of software which allows users to build, run and manage containers.
Now what is Kubernetes?
Kubernetes is a system for running and coordinating containerized applications across a cluster of machines. It is a platform designed to completely manage the life cycle of containerized applications. Few points need to know why to use Kubernets: * Load Balancing * Scaling * Storages * Self-Healing * Automated Rollouts Overall we can say that it improves the scalability of an application to the next level and which will be automated too.Docker is a software that allows you to containerize applications while Kubernetes is a container management system that allows to create, scale and monitor hundreds and thousands of containers. I have a simple web application in my github GitHub_Repo
Steps to deploy on Google Kubernetes Engine:
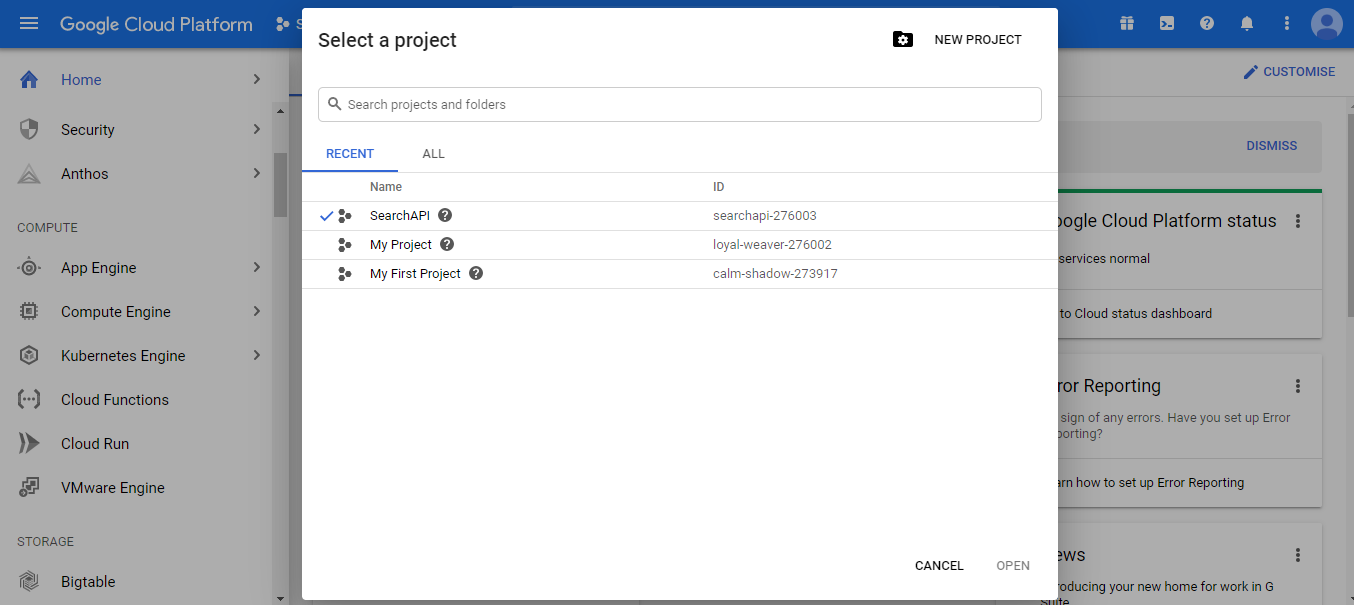
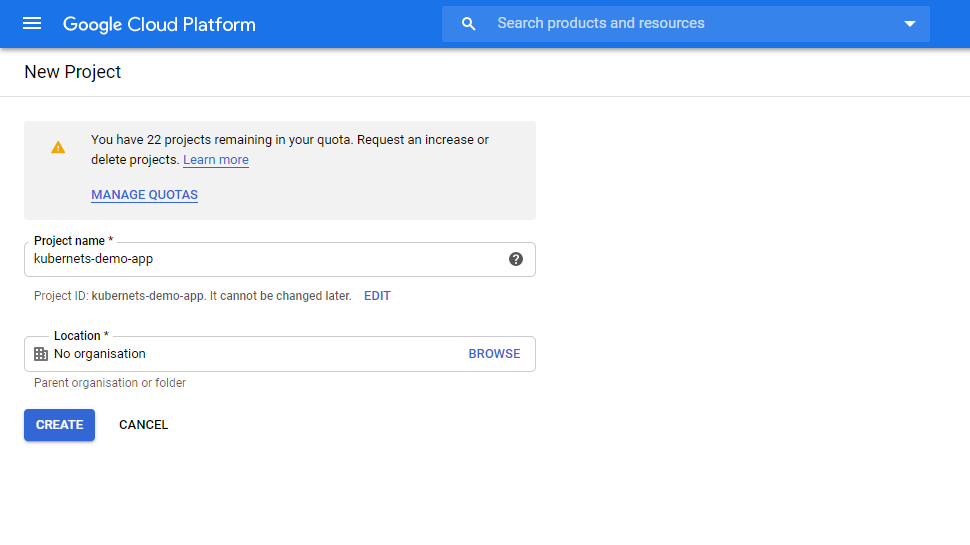
Step 1: Create a new project in GCP Console
Sign-in GCP console –> Manage Resources –> Create New Project
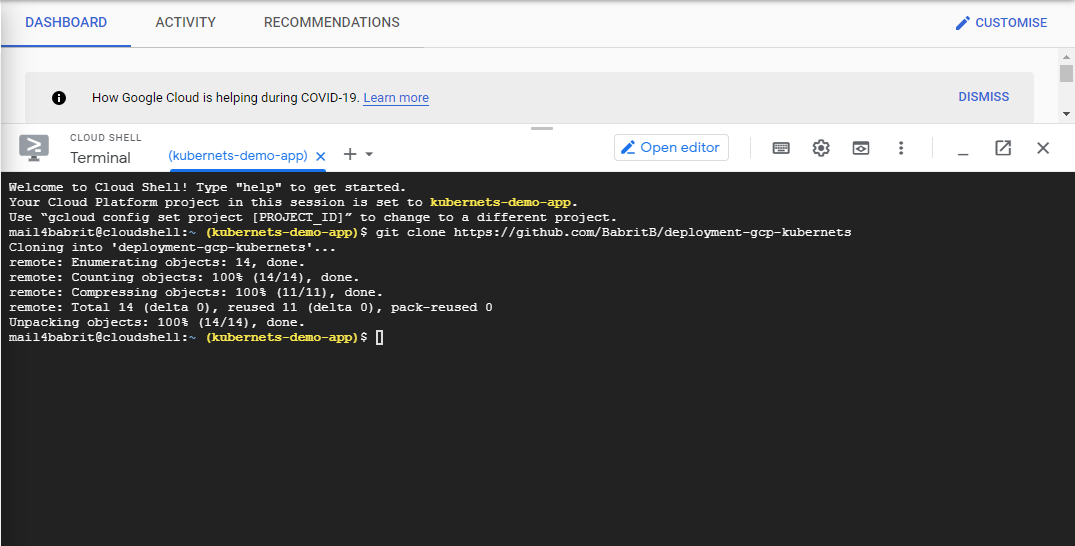
Step 2 : Activate Cloud Shell:
Execute the following code in the cloud shell to import the app.
git clone https://github.com/BabritB/deployment-gcp-kubernets
Step 3: Set Project ID Environment Variable:
export PROJECT_ID=kubernetes-demo-app
Remember to change the directory and point to the app folder where Dockerfile is present
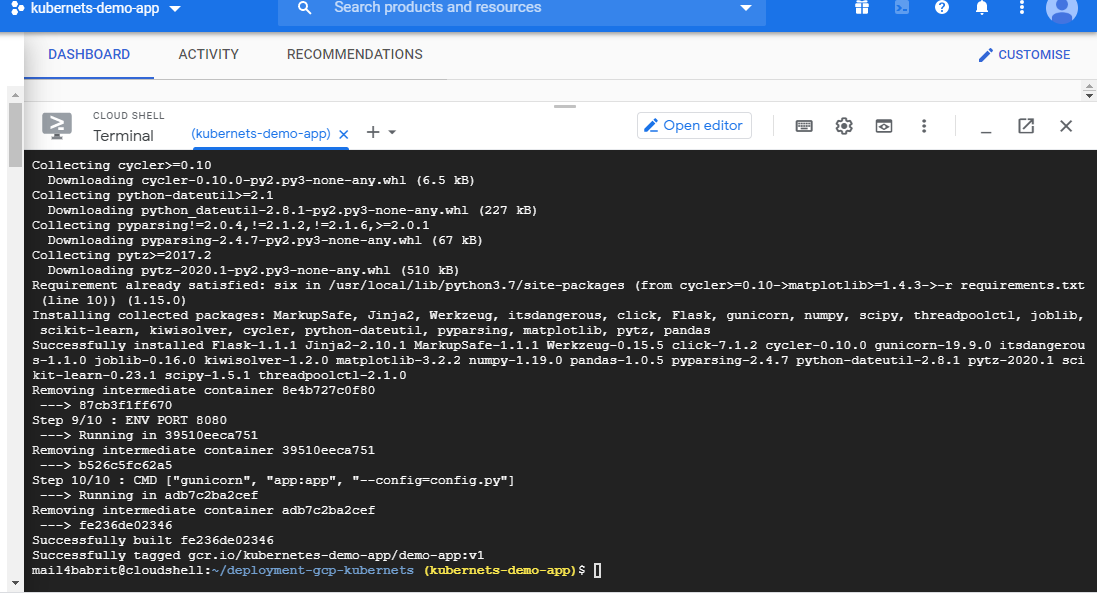
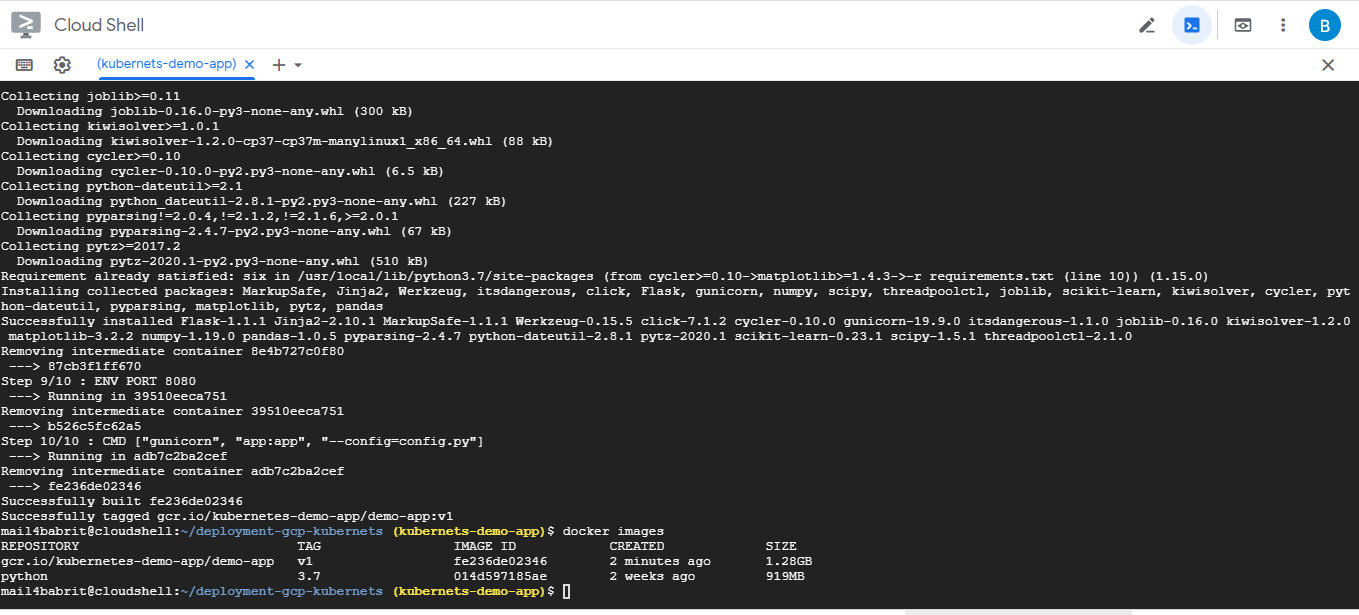
Step 4: Build the docker image.
docker build -t gcr.io/${PROJECT_ID}/demo-app:v1 .
Check the created images:
docker images
Step 5: Upload the container image.
gcloud auth configure-docker
Upload the docker image to Google Container Registry:
docker push gcr.io/${PROJECT_ID}/demo-app:v1
Step 6: Create Cluster.
Now you need a cluster to run the container. A cluster consists of a pool of Compute Engine VM instances, running Kubernetes.Set your project ID and Compute Engine zone options for the gcloud tool:
gcloud config set project $PROJECT_ID
gcloud config set compute/zone us-central1
Create Cluster:
gcloud container clusters create insurance-cluster --num-nodes=1
Remember the number of nodes you specify is the important part as it will be the decision point of the way of load balancing.
Step 7: Deploy Application.
kubectl create deployment demo-app --image=gcr.io/${PROJECT_ID}/demo-app:v1
Step 8: Expose your application to the internet.
By default, the containers you run on GKE are not accessible from the internet because they do not have external IP addresses
kubectl expose deployment demo-app --type=LoadBalancer --port 80 --target-port 8080
Step 9: Check Service.
Get the status of the service. EXTERNAL-IP is the web address you can use in browser to view the published app.
kubectl get service